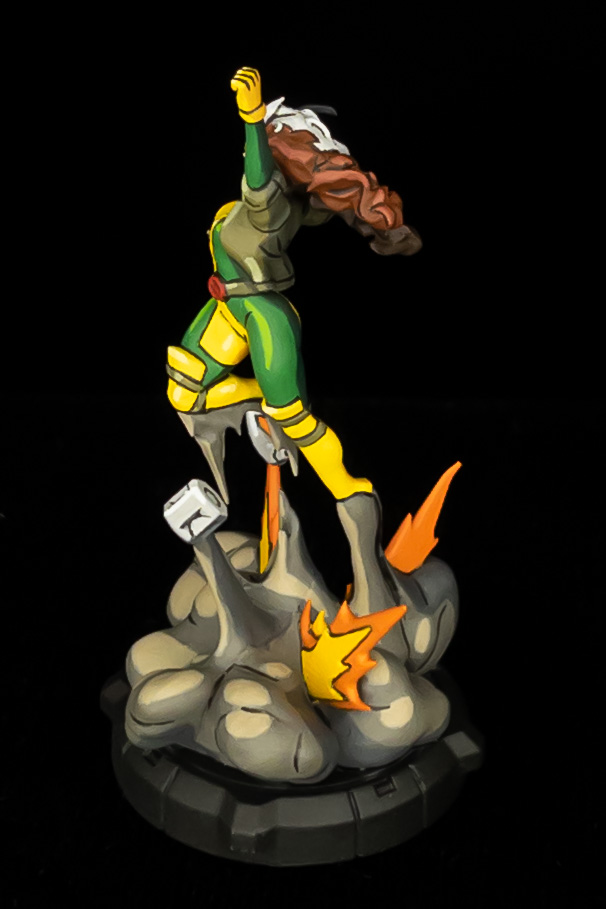
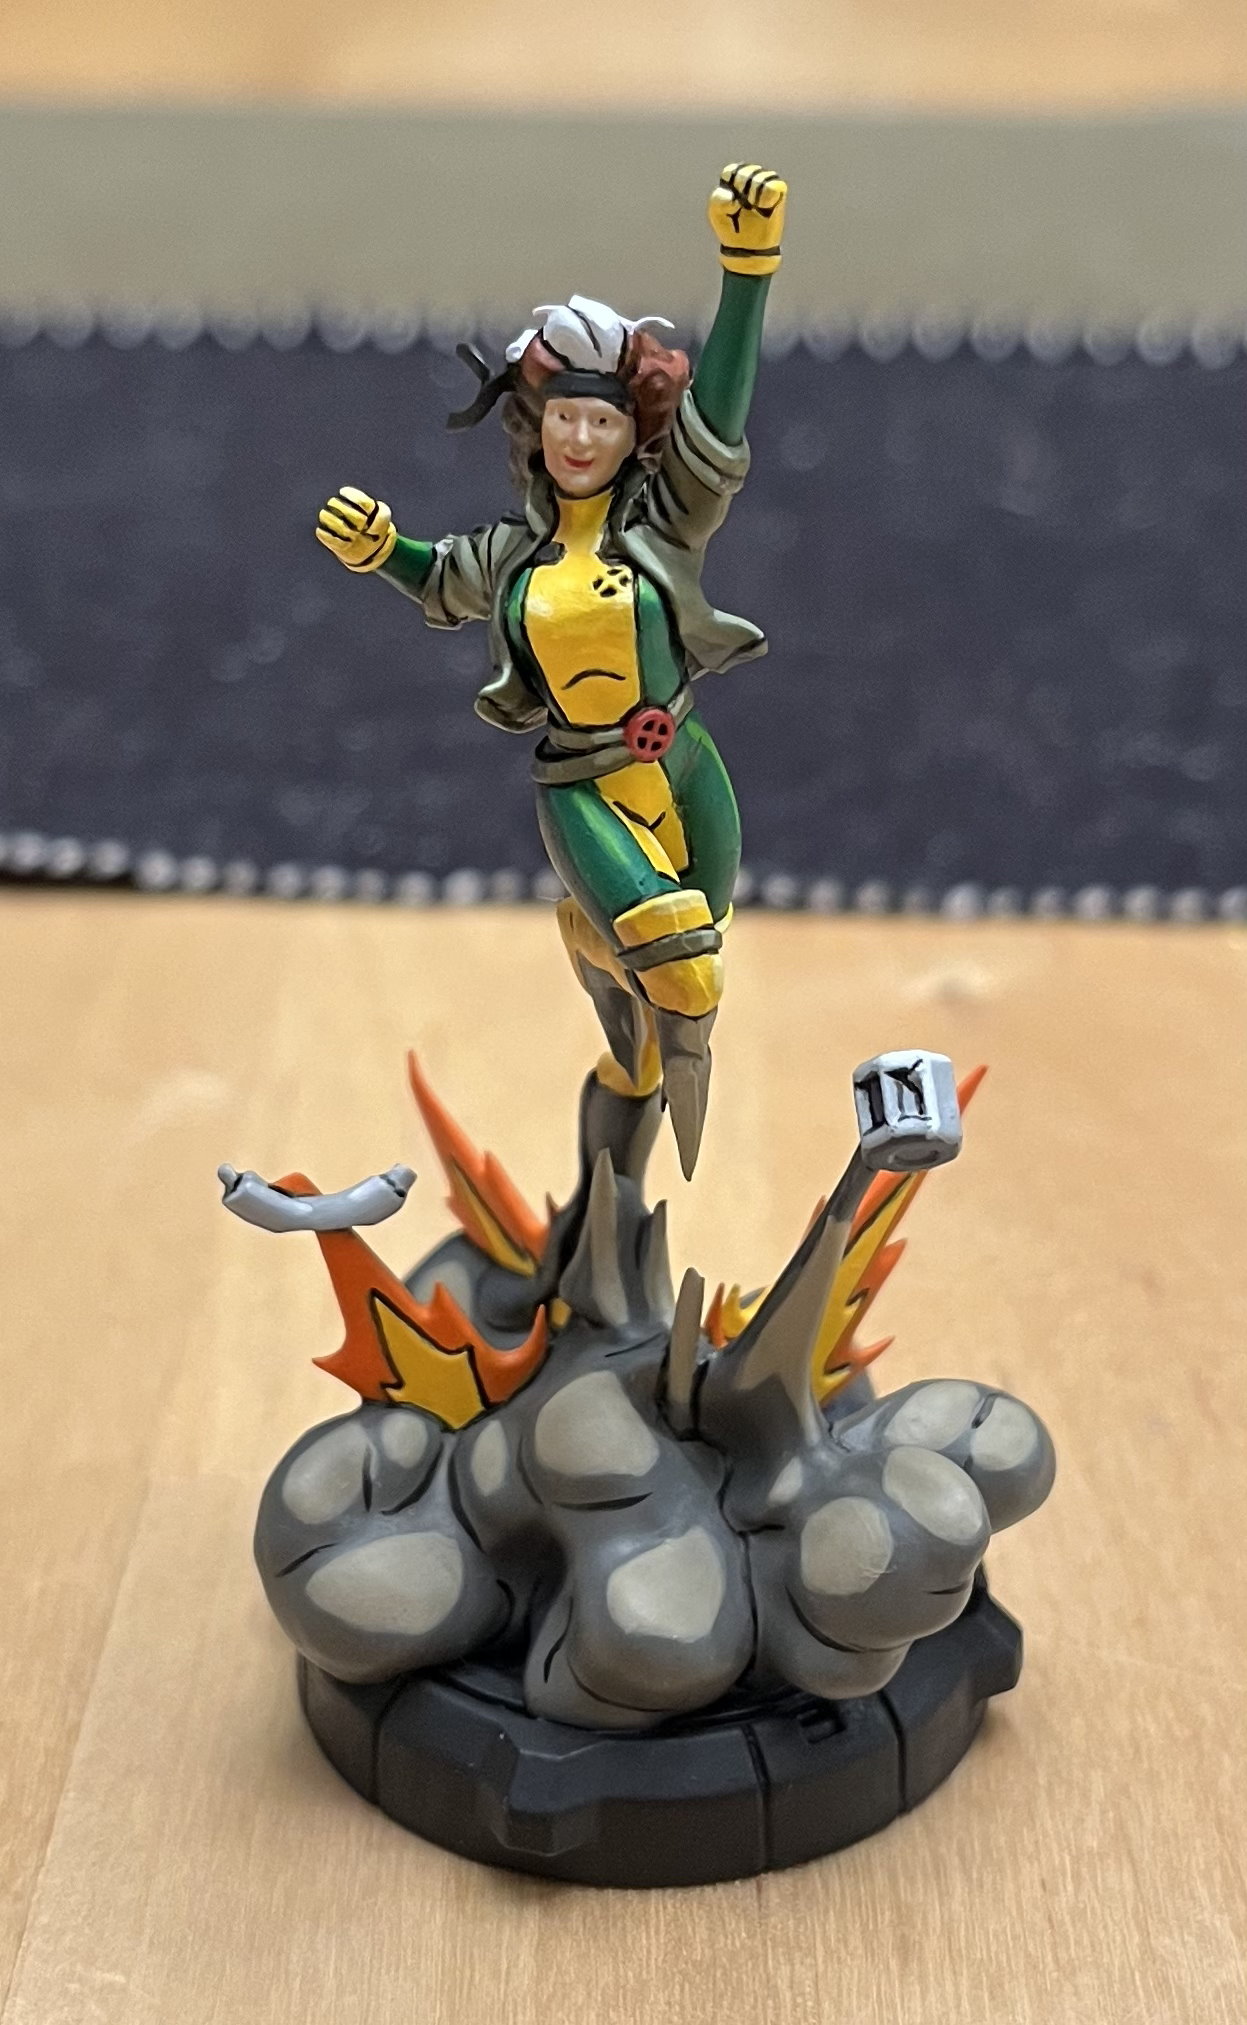
I’ve been having some fun over the last year doing a handful of models in a cel-shaded or “cartoon” style. Basically, the goal is to look like classic animation, with solid colors, thick and stark highlights, and dark black outlines around everything. While my first test model was a random orc I have from a miniatures kickstarter many years ago, I’ve mostly been focusing on Marvel Crisis Protocol, where I’m slowly building up an X-Men squad based on the costume designs from the 90s animated show. In this writeup I’ll follow the process for the most recent miniature I painted from that line, Rogue.
The first step is to find some reference images. It’s easy to find lots of stills from the old show, so I just get a handful that show all the different costume elements of the character. It’s also important that they include shadow and highlight on different parts of the costume, as I’ll be using that to guide my color selections.
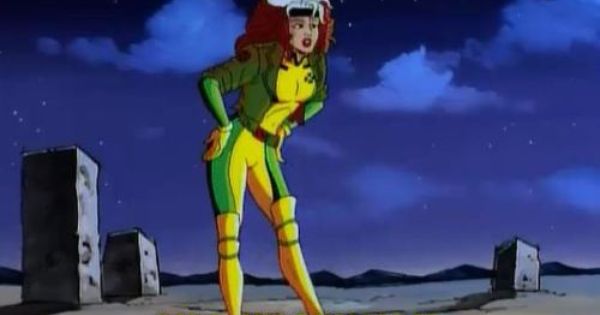
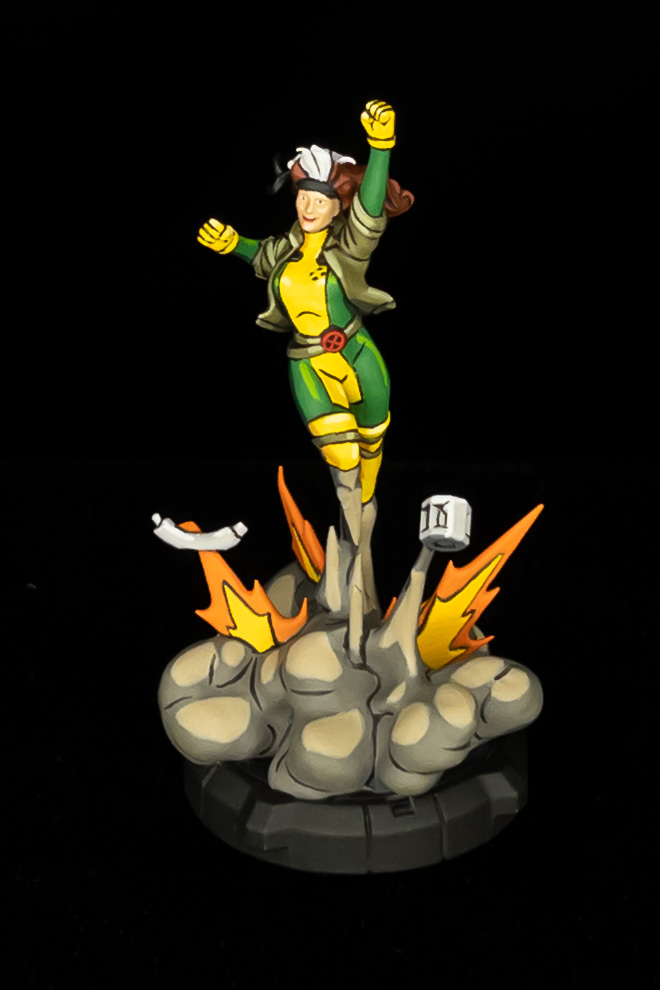
Having looked up references, I then pick shade/midtone/highlight color triads for all the different areas of the character. I can’t exactly reproduce the colors of the source, but I try to capture their essence. I also want to only use pure paints with no mixing, as it’s hard to get the absolutely flat and consistent coloration with any sort of custom mix. You can see below that I deviated slightly, with my version of her suit being a slightly darker green, and the jacket being a bit more olive drab. I also went slightly browner with her hair, to make sure it’s clearly differentiated from that of her teammate, Jean Grey.
Once I have my colors selected, I paint the entire model with my midtone paints. I’m going to go back over a lot of them with the shadow colors later, but this gives me a much better sense of the overall composition, and lets me delay picking where my light source is going to be coming from.
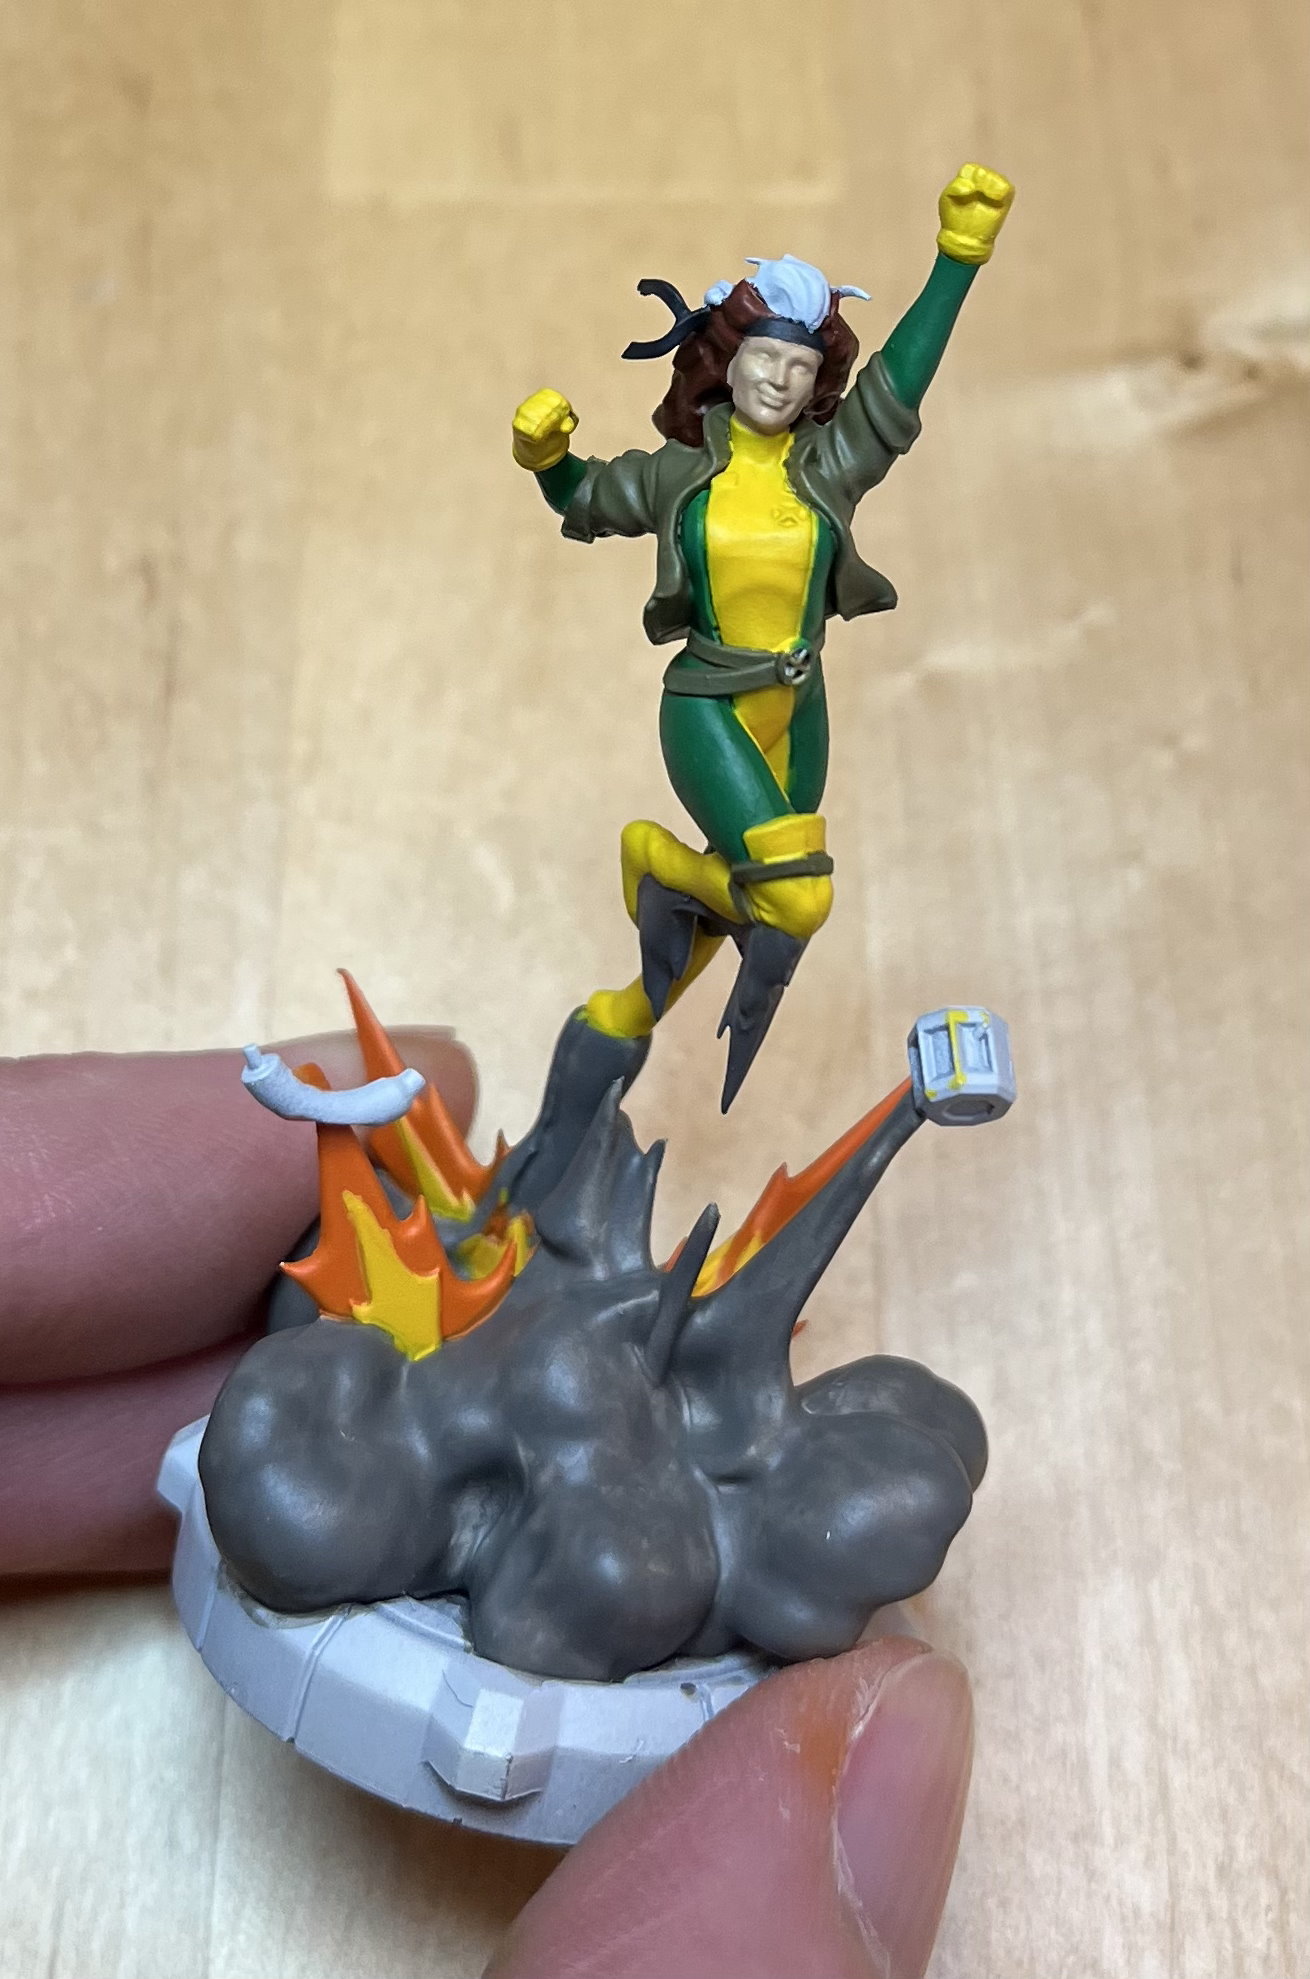
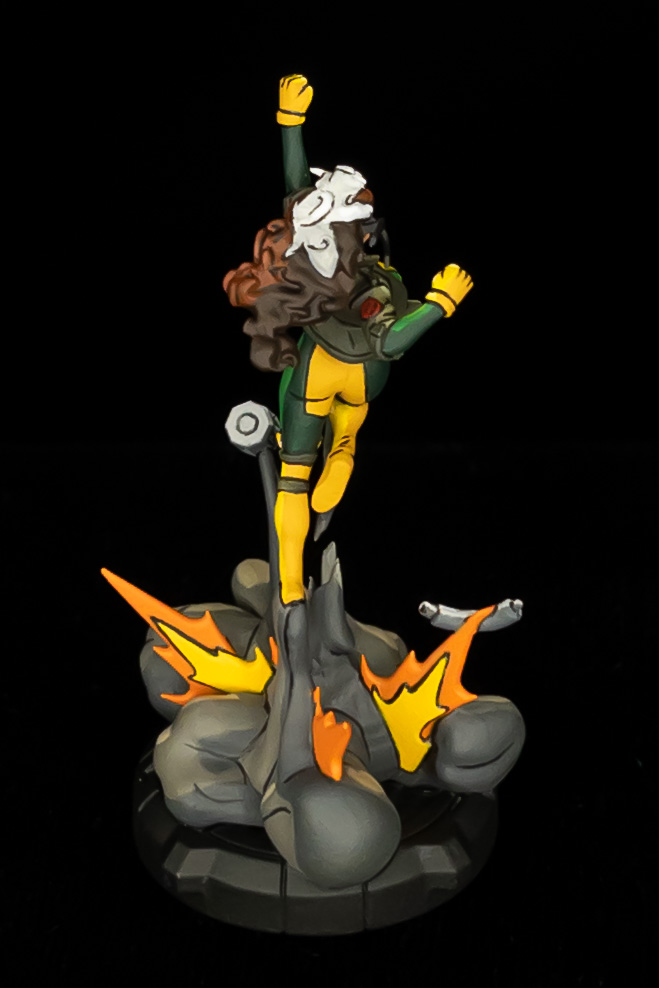
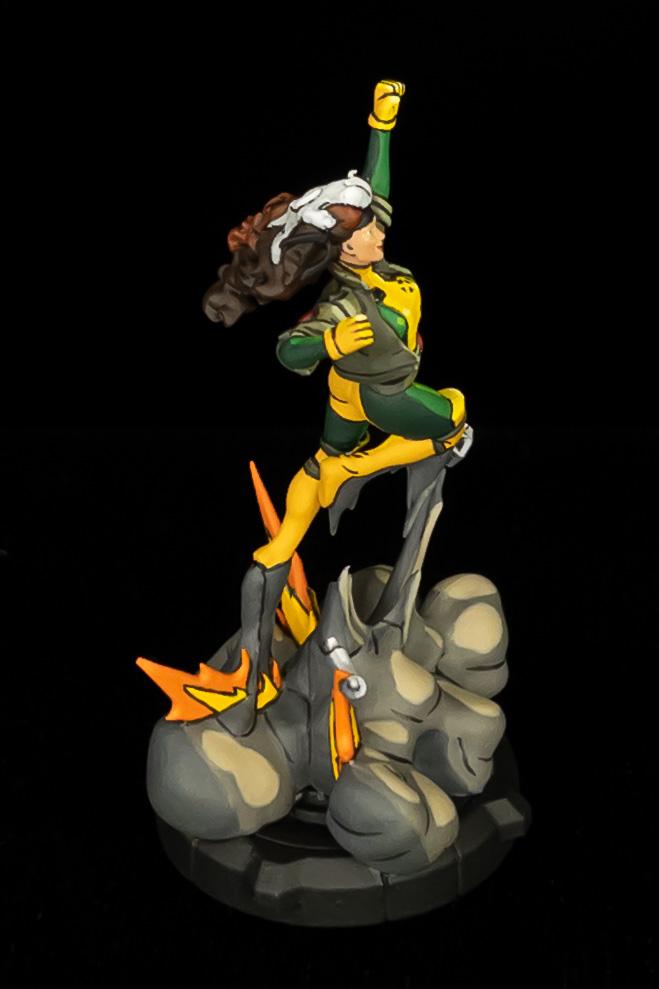
Next, I pick a light direction – in this case, it was above and to her left; looking down at her raised fist. I then paint over all of the parts of the model not visible from that angle with my darker shades. This doesn’t have to be 100% precise, as the model is expected to be viewed from any/all angles in normal conditions. However, having a consistent light source makes the shadows more believable. The key points are to make crisp and clean lines between areas and to make sure that the shadow edges remain consistent as they pass across differently colored and shaped areas.

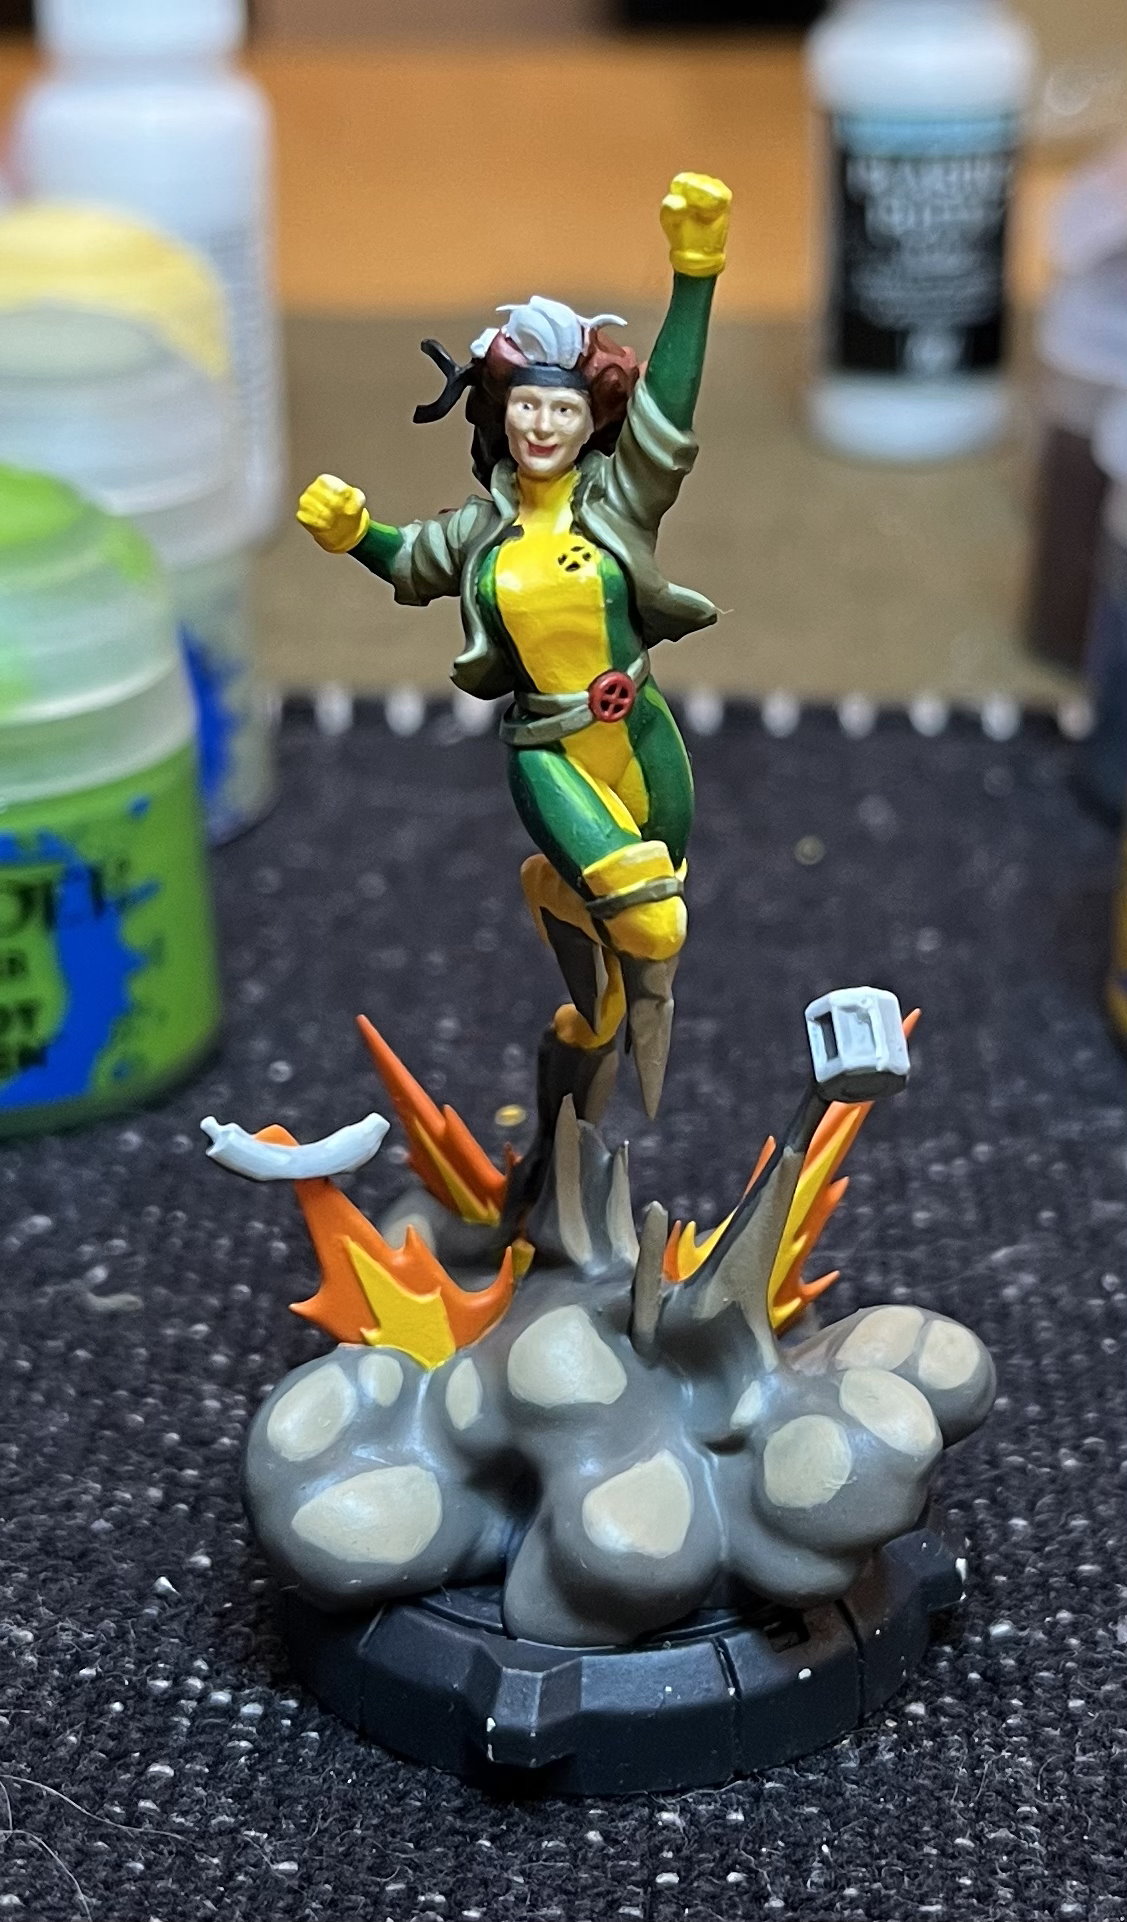
After that, I add various small details and a layer of very bright highlights. These highlights are in small bands and are where I imagine the light catching on the edges or high points of materials. I try to follow and accentuate the natural curves of the model’s anatomy and clothing for this. It’s only at this point that the model starts coming together; I generally find the half light / half dark state of the model up to this point to not be very aesthetically pleasing.
The next step brings the model together even more, by adding black outlines around everything. I use black acrylic ink and a small brush, although I’ve heard of some people using very fine pens for this step, as one might with a Gunpla model. I inevitably make some mistakes in this step, but I press onwards regardless. MCP models generally have fairly sharp detailing, and I try to outline every sculpted detail, as well as adding some additional linework where I feel like the detail is lacking and I want to add some visual interest.
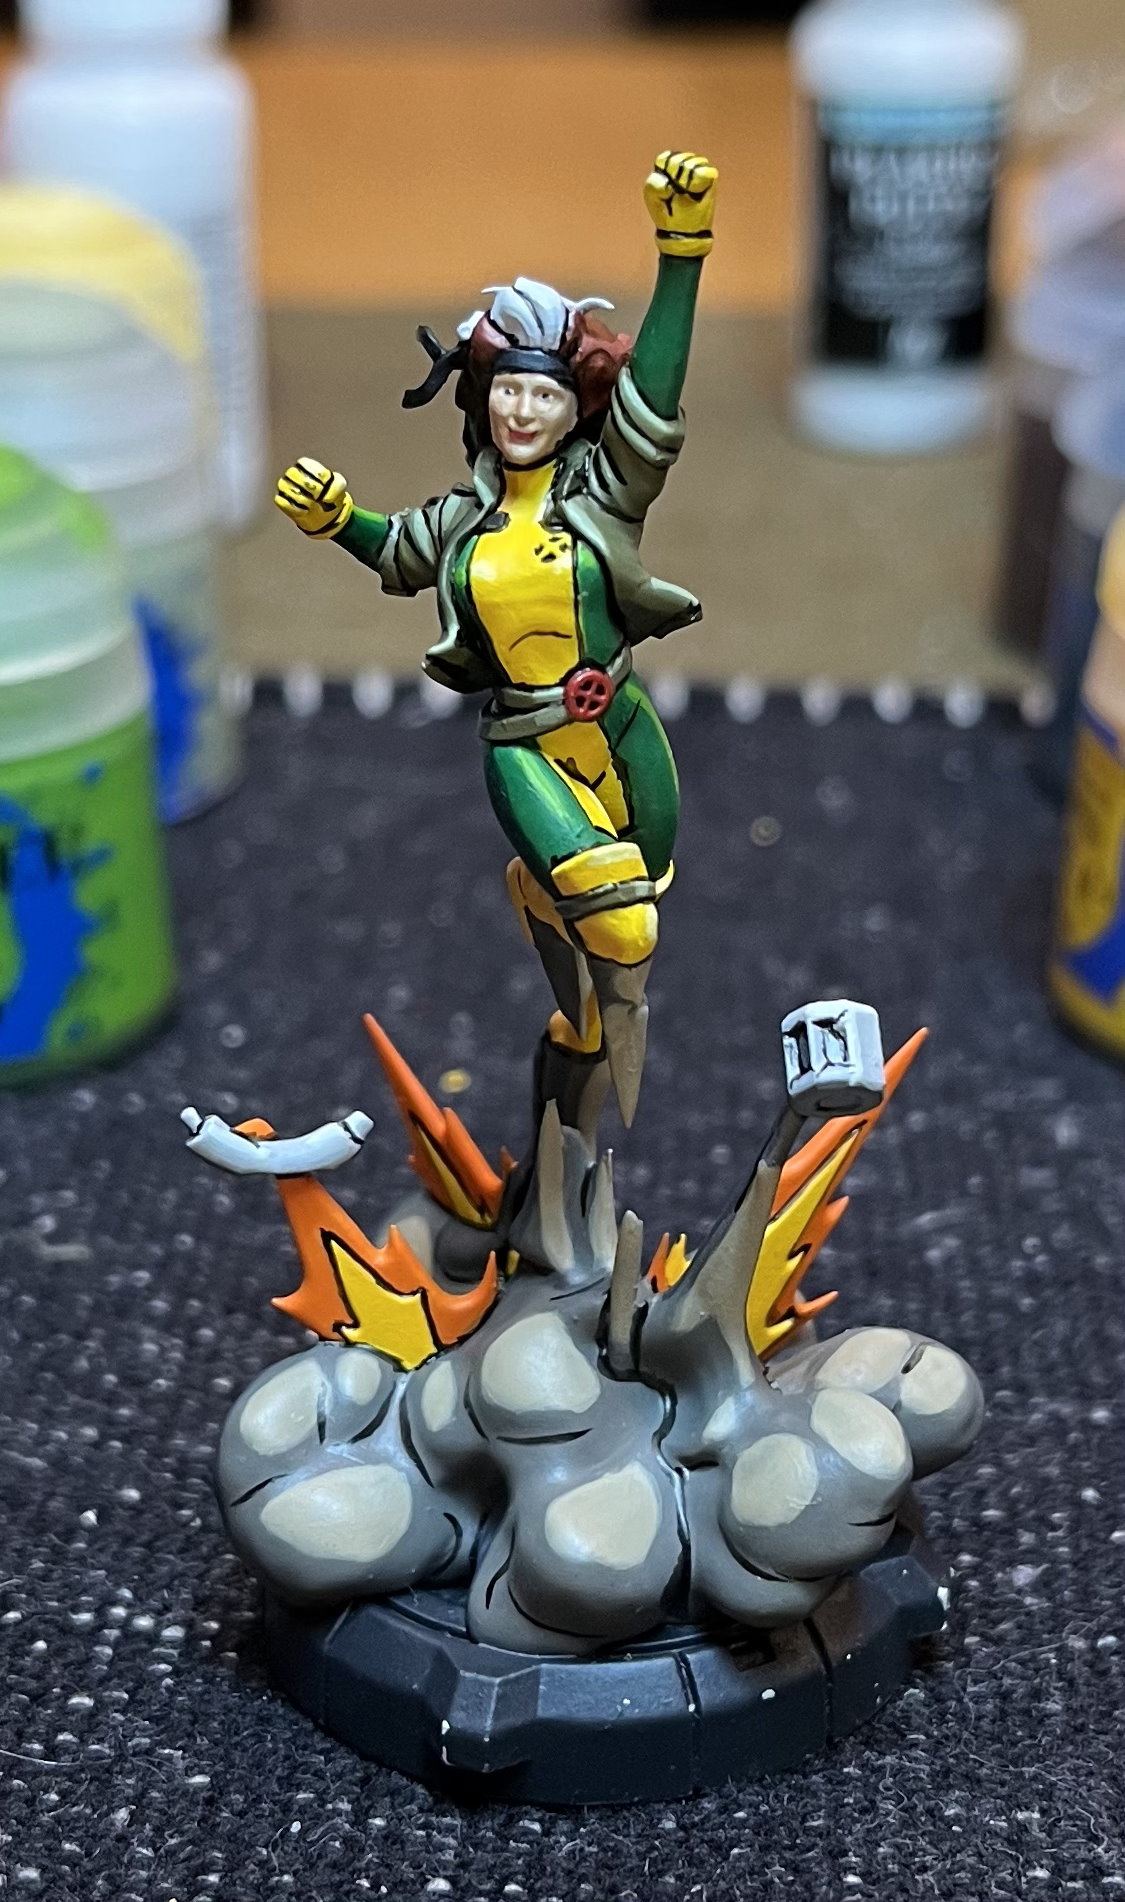
After that, it’s just some more cleanup to neaten the black outlines and any other mistakes that come to my attention.
Finally, just a few layers of matte varnish to provide protection and a consistent surface finish (the ink is quite glossy and different paints do not always have the same level of shine). Then it’s off to the light box for some glamour shots.